|
BBDS Design Audio
Getting your Trinity Audio player ready...
|
Why monitor your traffic with Google Analytics?
- Measure site traffic
- Record search queries (in conjunction with Google Search Console)
- Find out where your visitors come from, and what devices and browsers they use
- Determine which pages are most popular
- See page loading speed measurements, etc.
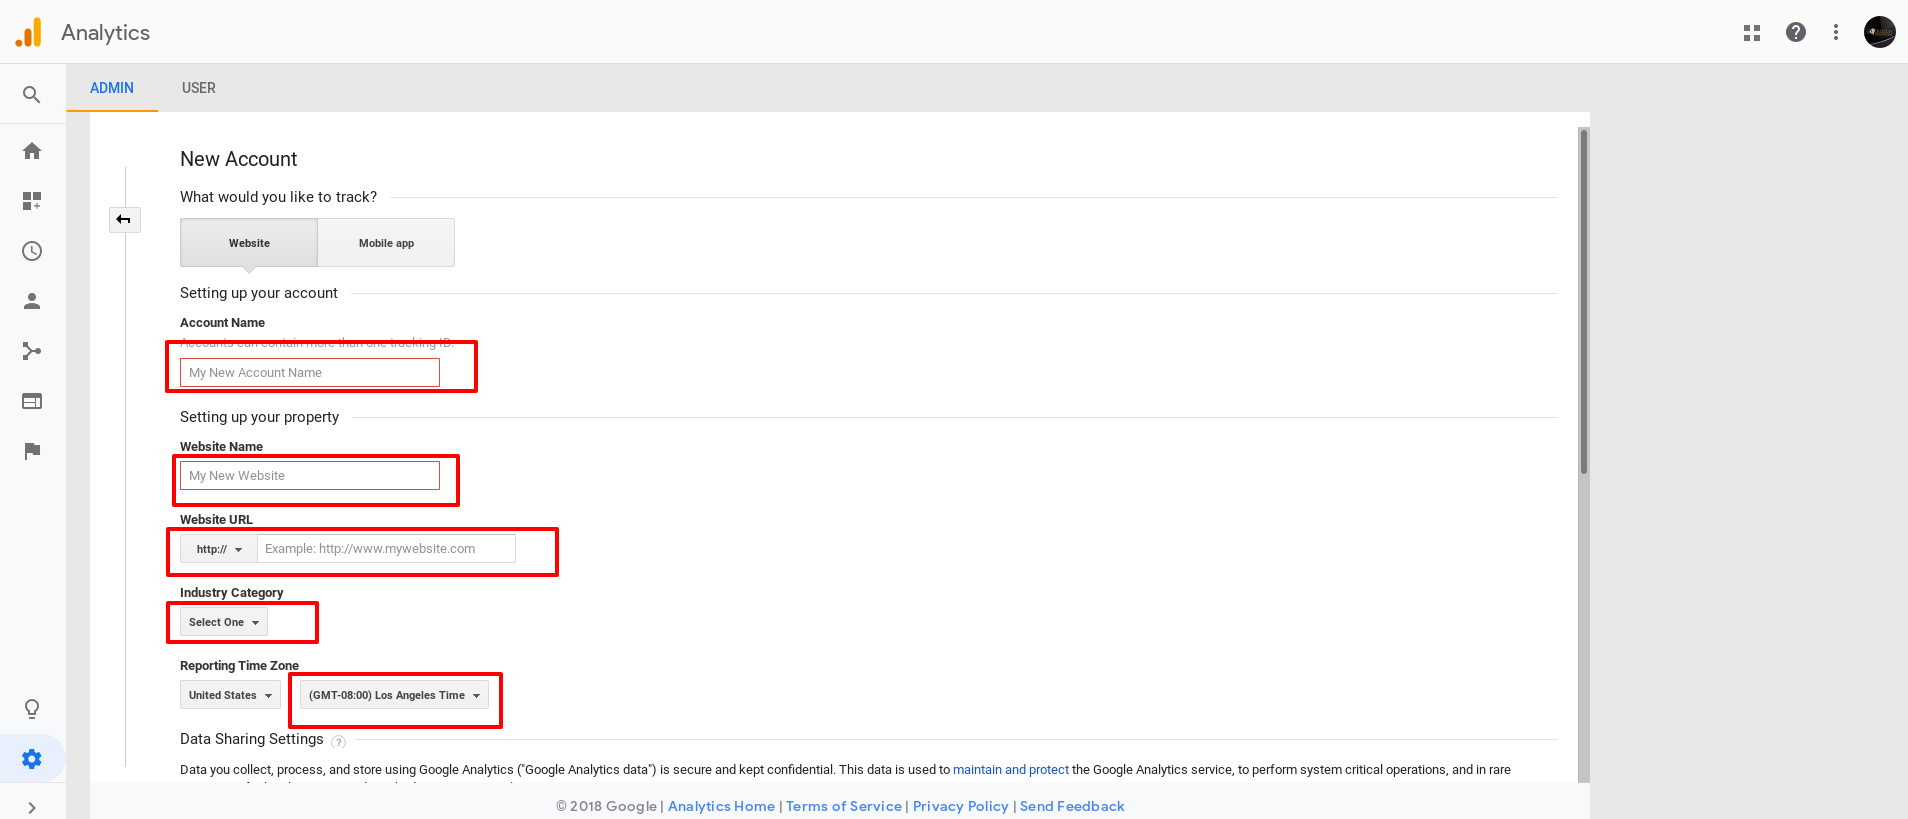
Steps to getting a Google Analytics tracking ID: Sign up for a GA account at analytics.google.com (one button click if you already have a Google account). Submit the account name, website name & URL, industry category, time zone, and accept the Terms & Conditions. That’s it. You have an account.

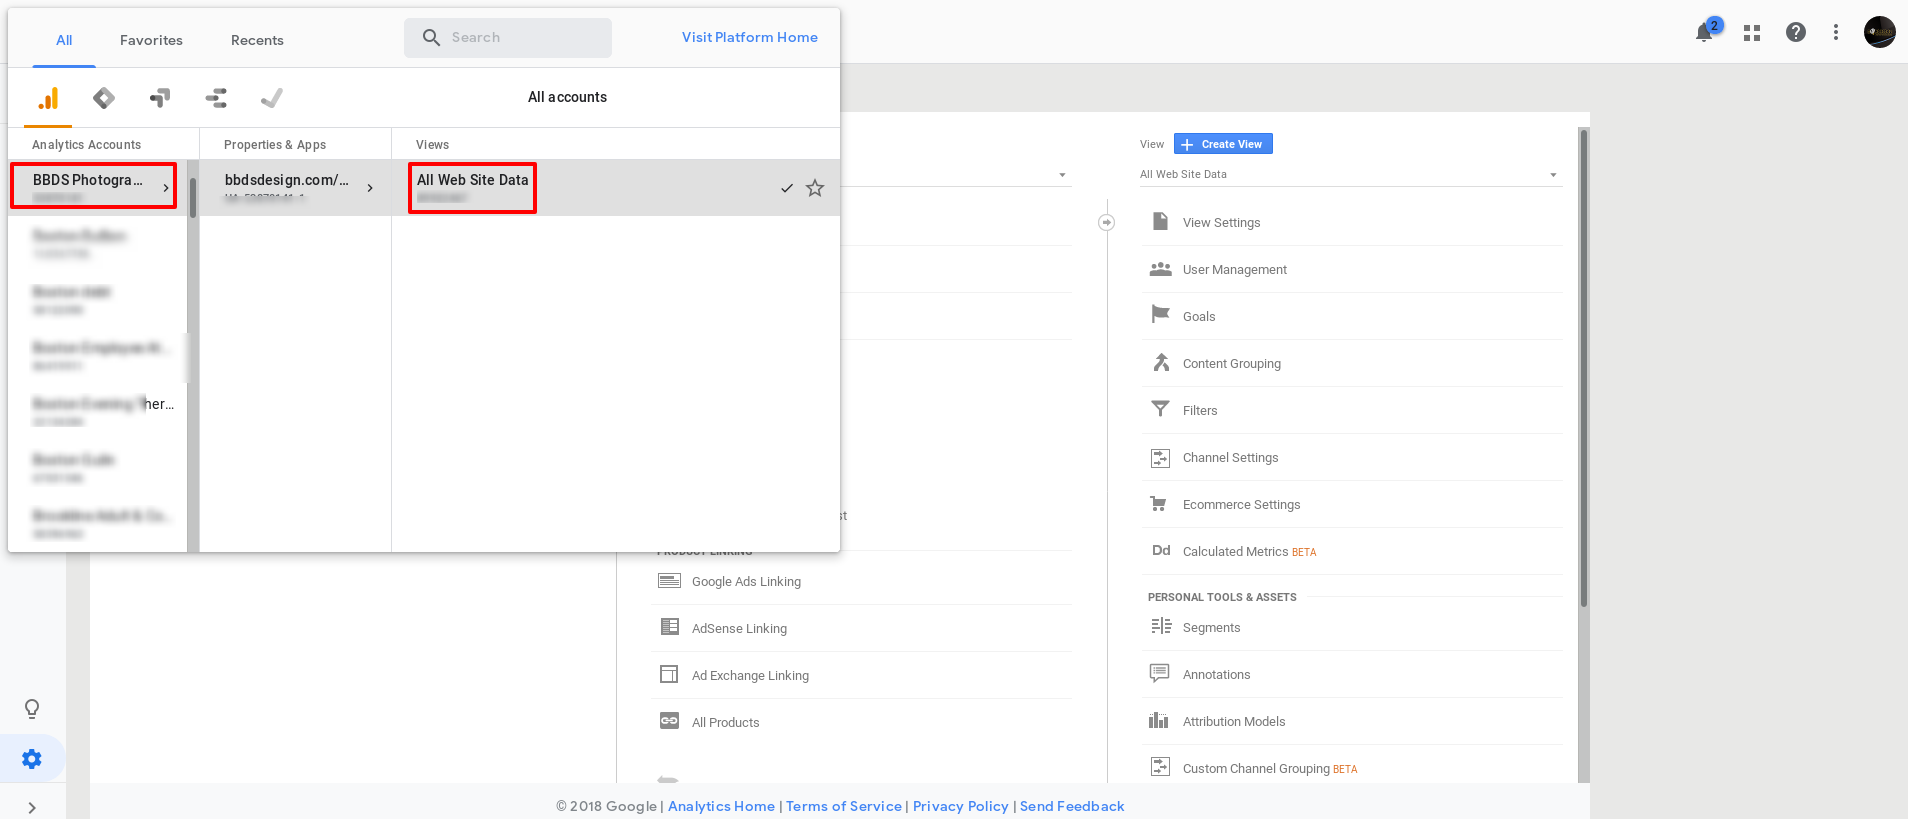
Now grab your Tracking ID. Click the “gear” icon in the lower left corner to open the admin panel. You need to navigate through Account Name, Property, Views to get to the Admin view.

You can have 100 Google Analytics accounts attached to one email address, and GA account can have 50 properties & views within it. A property can be a separate website URL. A view is a selection of the data to view. You can filter out the home office IP addresses, for example, so that you are only viewing external traffic to your site. You typically want to retain one view which is all of the raw data collected -- once the data is filtered from a view it is gone forever. Read more about the structure of Google Analytics accounts.
Now expand the Tracking Code link to see the tracking ID. You can use either the bare Tracking ID, of the form UA-53780042-1, or grab the complete javascript snippet:
![]()
Which one you grab depends on how you intend to implement it on your site.
- Simplest case in WordPress, use a Google Analytics plugin. I am going to discuss recommended plugins below.
- Add the javascript snippet to the header.php file of your theme (preferably child theme) so it appears on every page/post of your site. Quite easy but not for the faint of heart.
- A third method is to implement this via Google Tag Manager. If you are really into tracking your site Google Tag Manager is a cool tool to start with.
Choosing a Google Analytics Plugin
Most people implement the tracking code using a plugin. Most of the plugins have a handy feature that allows you to exclude the tracking code on pages served to logged in admin users, or users with certain WordPress roles like Editor. This is a useful feature and is faster than establishing an IP filter, and also gets around the very common situation of dynamic IP addresses.
Other than the admin filtering feature, we opt for the simplest possible Google Analytics plugins. There are plugins like "Google Analytics Dashboard Plugin for WordPress by MonsterInsights" that have many bells and whistles like putting analytics data in your WordPress dashboard. If you want this, go for it, but you would be better keeping a lean WordPress install with the fewest and smallest plugins in the interests of speed. Larger plugins with more functionality are slower and plugins that grab external data are slower yet. Yoast sold this plugin to MonsterInsights and they are trying to monetize it with extensions.
Lean and mean Google Analytics plugins to try:
GA Google Analytics by Jeff Starr -- 5 star rating and 200,000 installs.
Google Analytics by WebKinder -- 4.5 star rating with 20,000 installs.
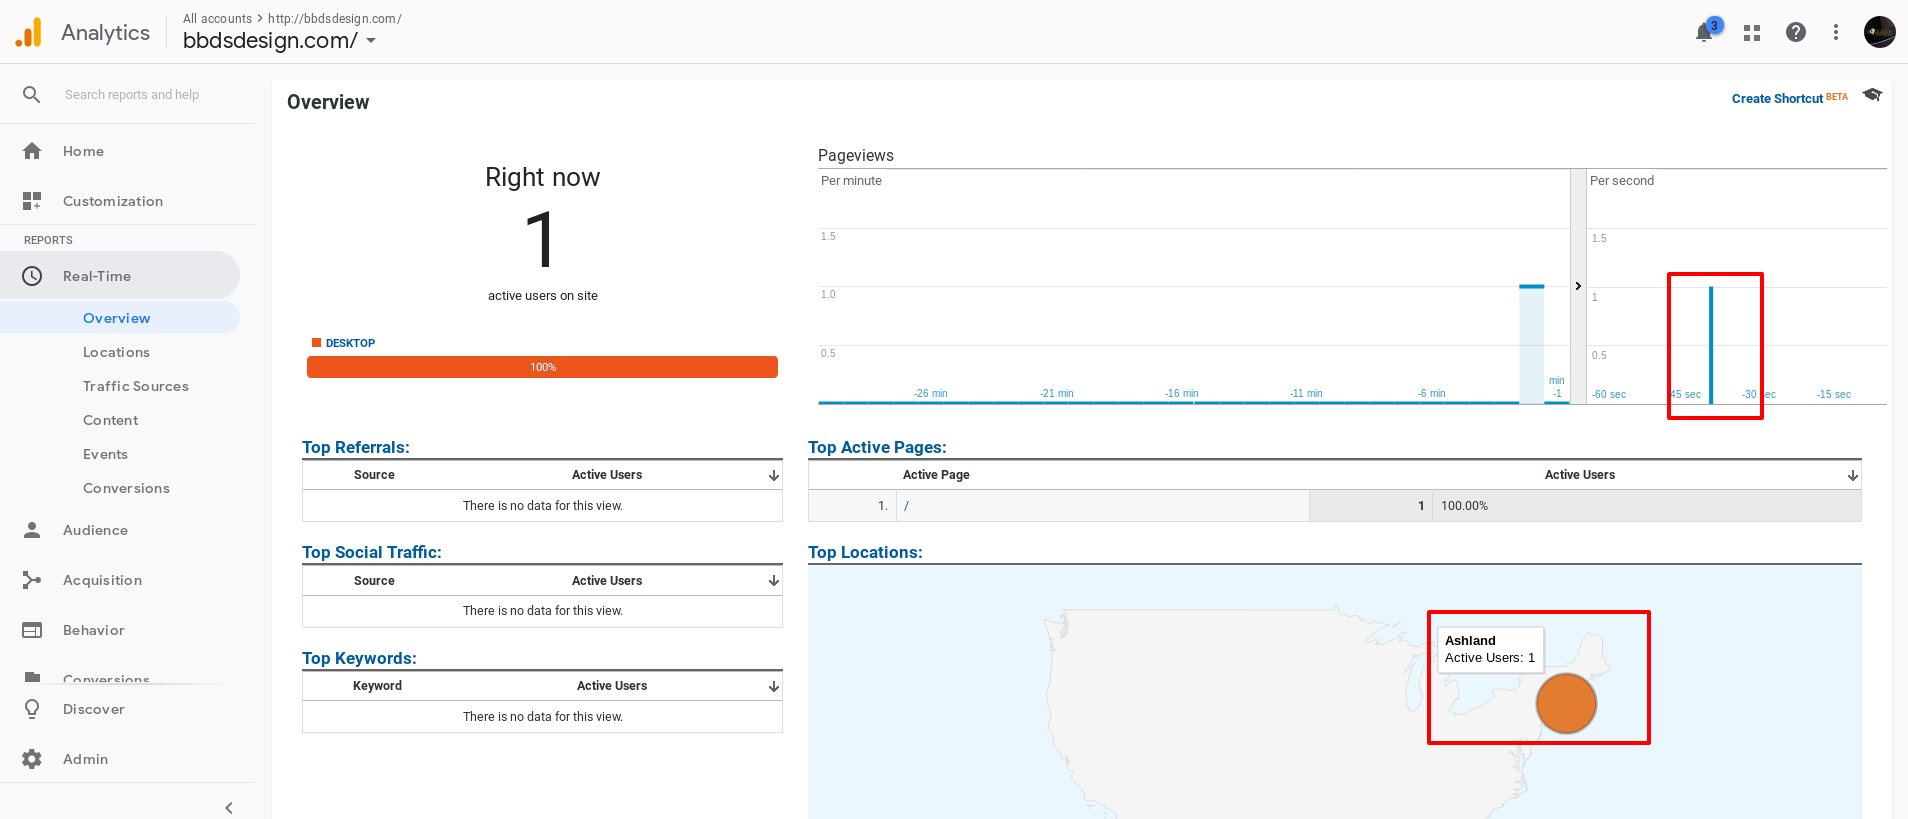
Add your tracking ID to the settings screen of the plugin, then save and test the real-time view in Google Analytics. That's right, you can follow site visits in real time. Make sure you do this in a clean browser that has no login cookies from your WordPress site, then navigate to your site and click through a few pages. Open the Google Analytics account and select the Real-Time - Overview view. If this is your first time or if your site is low traffic you may have to wait a few minutes for the semaphore to appear in your account. When the location beacon shows (an orange circle on the map), hover over it and it will show the city and state of the IP address. This confirms your tracking code is properly installed.

You can also directly search the source code of your web page for the tracking code. On most browsers you get the source cod view by pressing Control + U (Command + U on a Mac). Switch to that tab, and search for "UA-". That is enough to identify the GA tracking code on most pages. Below I show an example with a small piece of source code from a web page showing the tracking code for a web site.

The importance of collecting data about website traffic cannot be overemphasized. You can do this stuff or we can do it for you. We setup Google Analytics for you during SEO. We do SEO assessments, training, and SEO, and we have ongoing SEO marketing plans. Email us, if you have questions.


